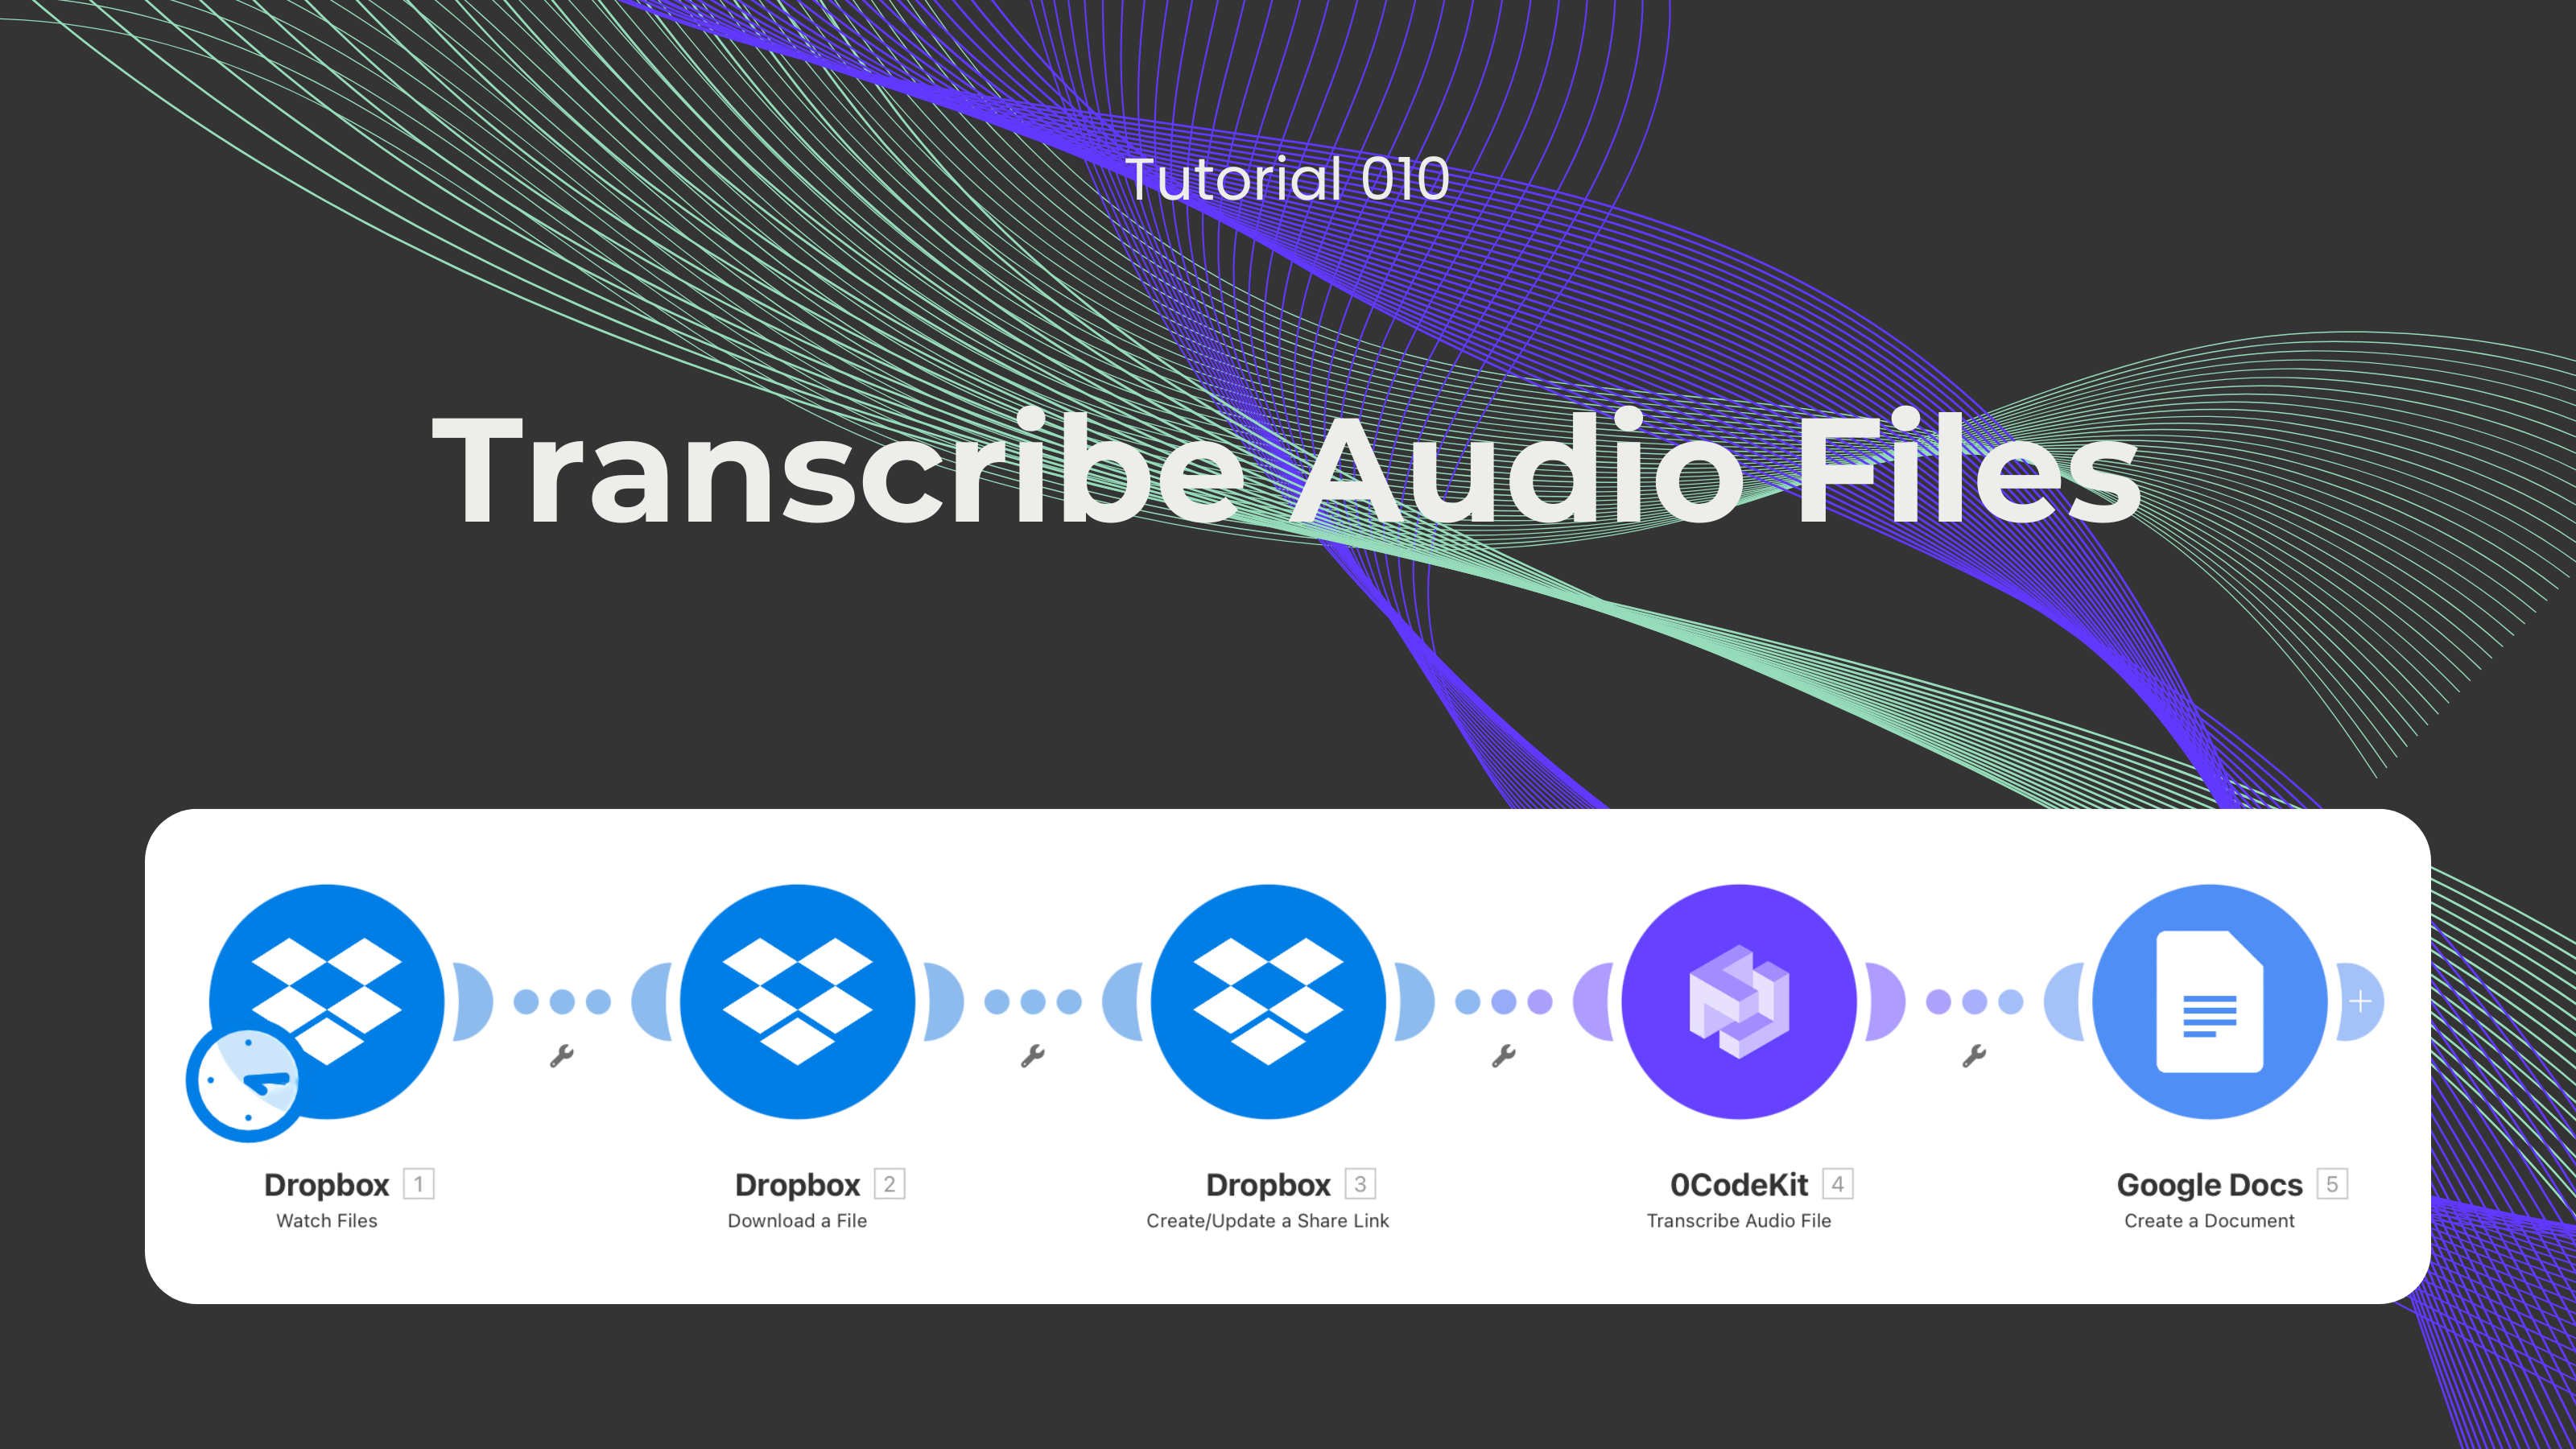
Audio Transcription Tutorial
.png)
Audio files have gradually taken a primary focus on how humans communicate. Audio files, such as speech memos or audio embedded in videos (YouTube videos, lectures, etc.), are used to a greater extent and for various purposes, like educational, entertainment, and many other types of content. Despite being practical and faster than writing or texting, sometimes the content in these audio files would be useful to have in text as well, since it might be better to understand or repurpose this content.
However, turning audio content into text could take forever to do. Luckily, we have an endpoint that can automate this whole process in a matter of minutes. In this blog, we would like to showcase one of our endpoints, which is able to take the content of an audio file and transcribe it.
Not a fan of reading? No problem! Check out our quick, easy-to-follow video tutorial to learn everything you need!
The first step is to upload the desired audio file into a storage solution, such as Dropbox or Google Drive. Then, we sign up or log into one automation platform where this feature is available (Make, Zapier, and n8n).

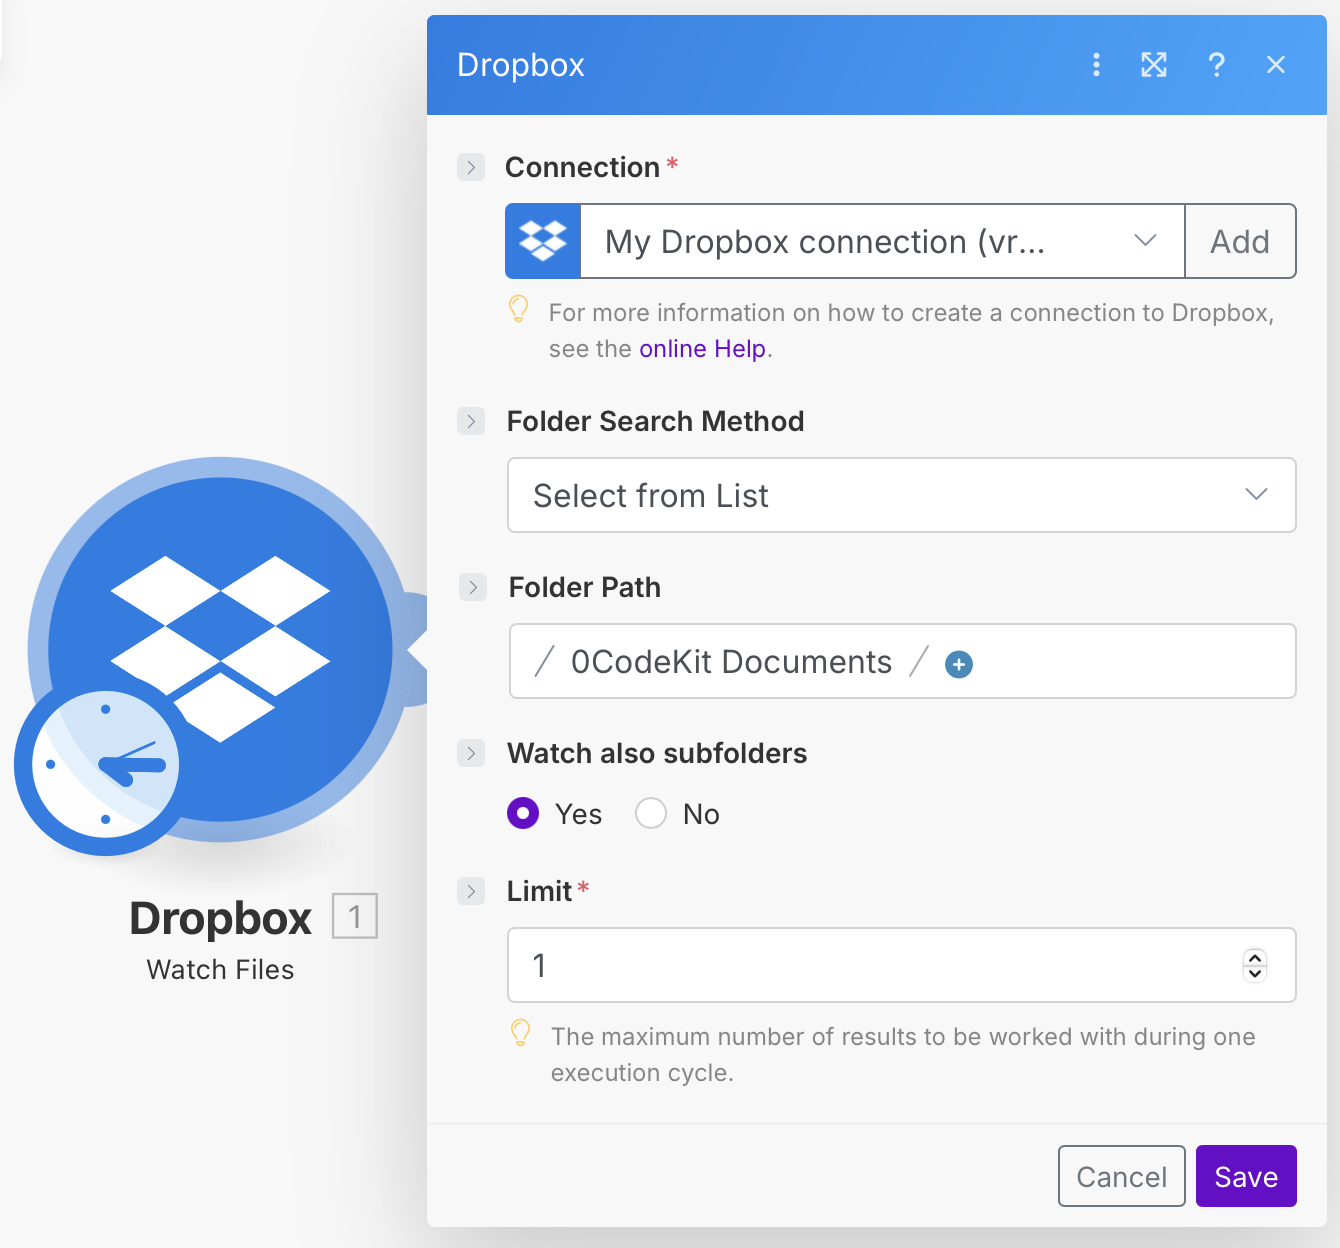
After that, we can set up the first Dropbox module and choose the event called "Watch Files", which will look at a specified folder, and it'll trigger whenever a file is uploaded, and if we want the module to look at the subfolders as well.
Later, we need to add a second Dropbox module with the event "Download File" for the 0CodeKit to access this document. To set it up, we only need to fill in which file we would like to download, and in the File field, we have to enter the "Path lower" icon.

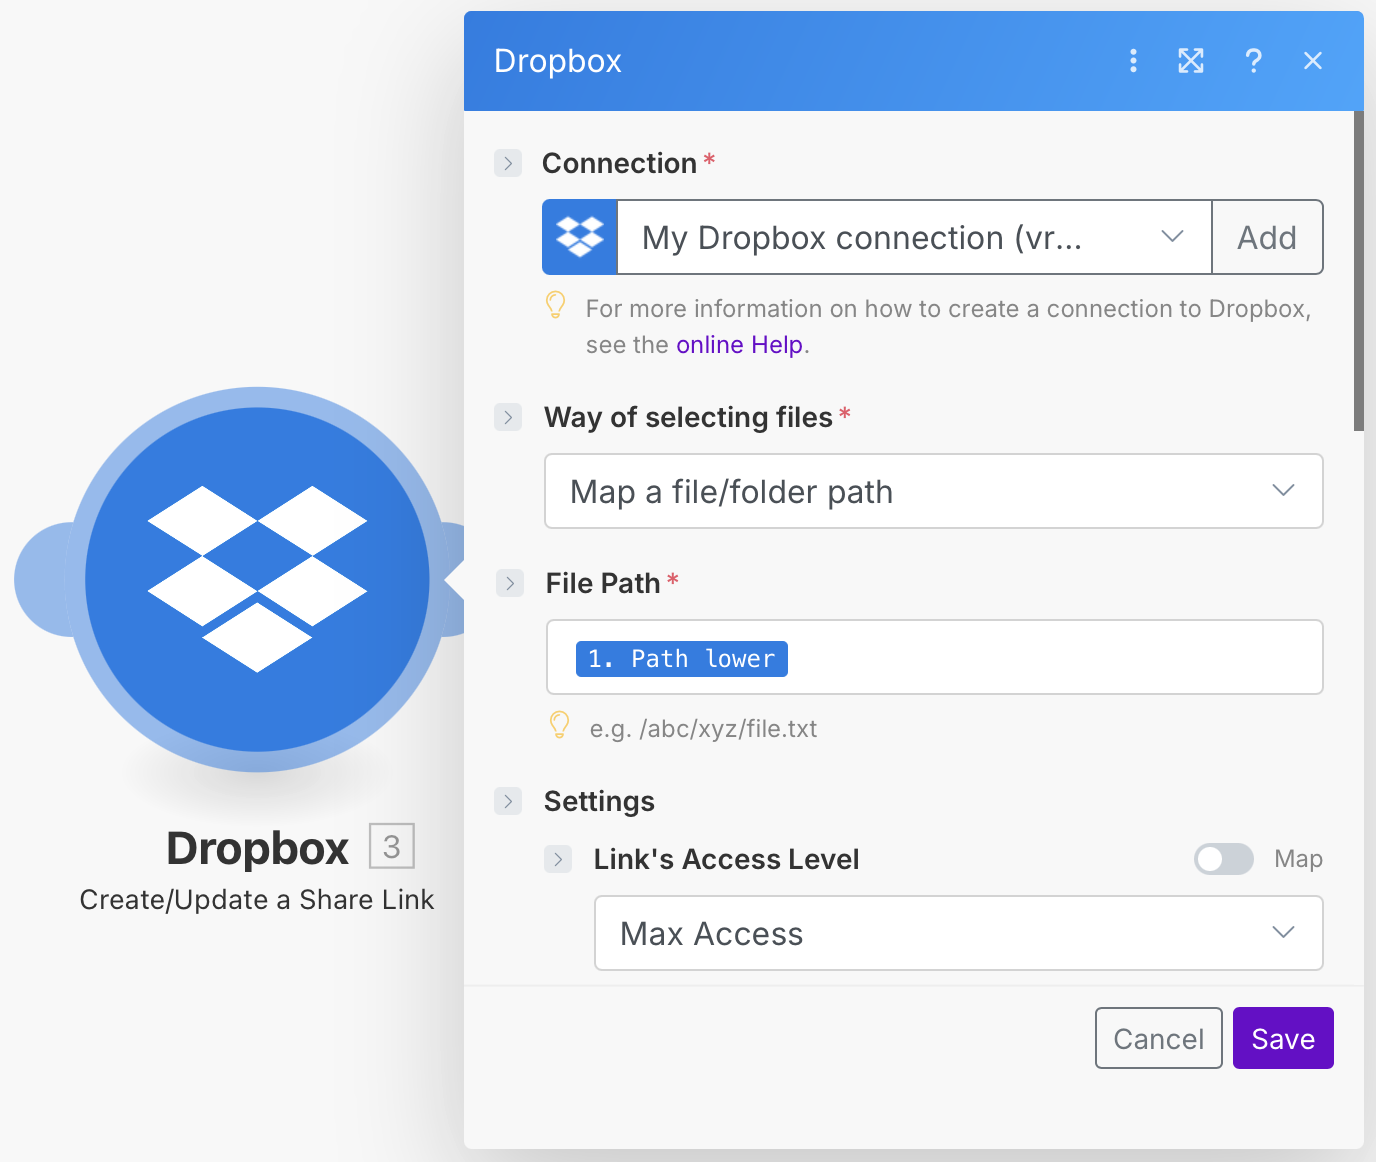
After that, we need to integrate one last Dropbox module and choose the event called "Create/Update a Share Link", which will create a URL for the audio files. This way, 0CodeKit will be able to redact the PDF. To set it up, we need to enter the "Path lower" icon into the File Path field, give the link full access so it can analyse and remove specific information, eliminate any password requirement, and click on "Allow to Download".
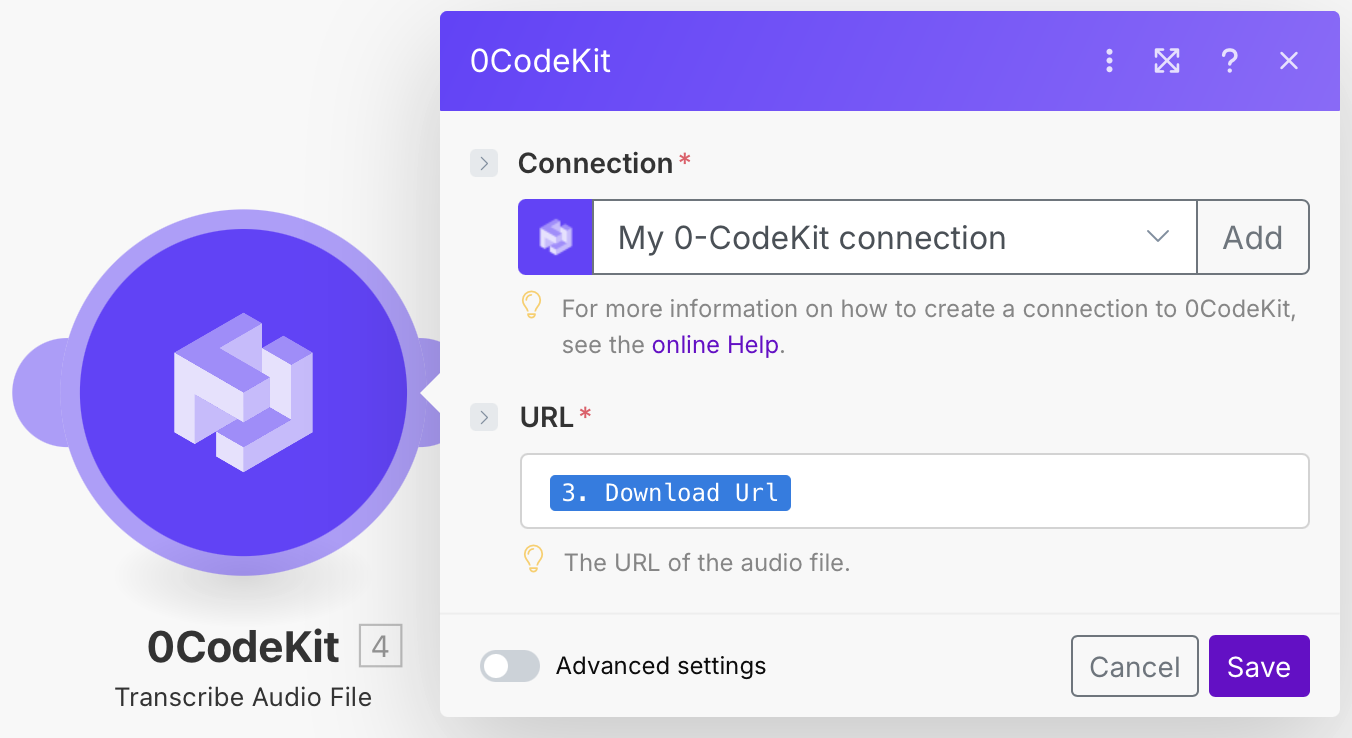
Next, we need to integrate one 0CodeKit module with the event "Transcribe Audio File" for the endpoint to download the audio file from the Dropbox URL. To set it up, we only need to enter the "Download URL" icon into the URL field.
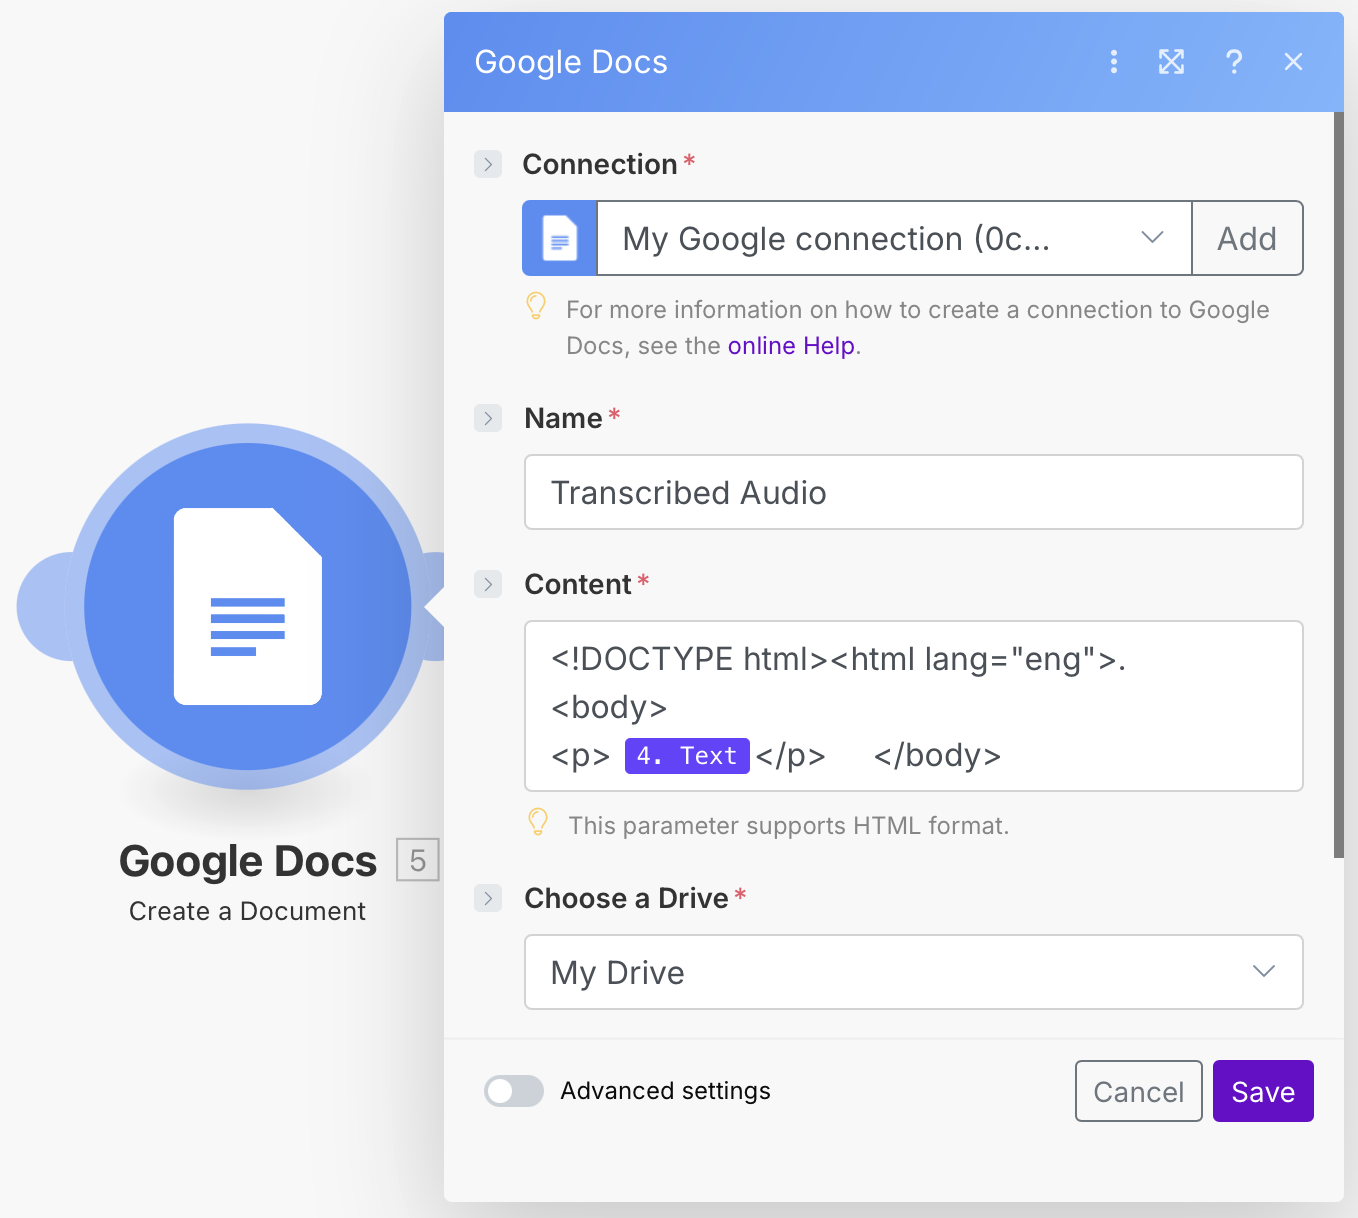
Finally, we need a document where to put the transcribed audio. Therefore, we will add a Google Docs module with the event "Create a Document". To set it up, we need to give the file a name, for the content we need to enter "<!DOCTYPE html><html lang="eng"><body><p>["Text" icon]</p></body>", and add a location to store the document.