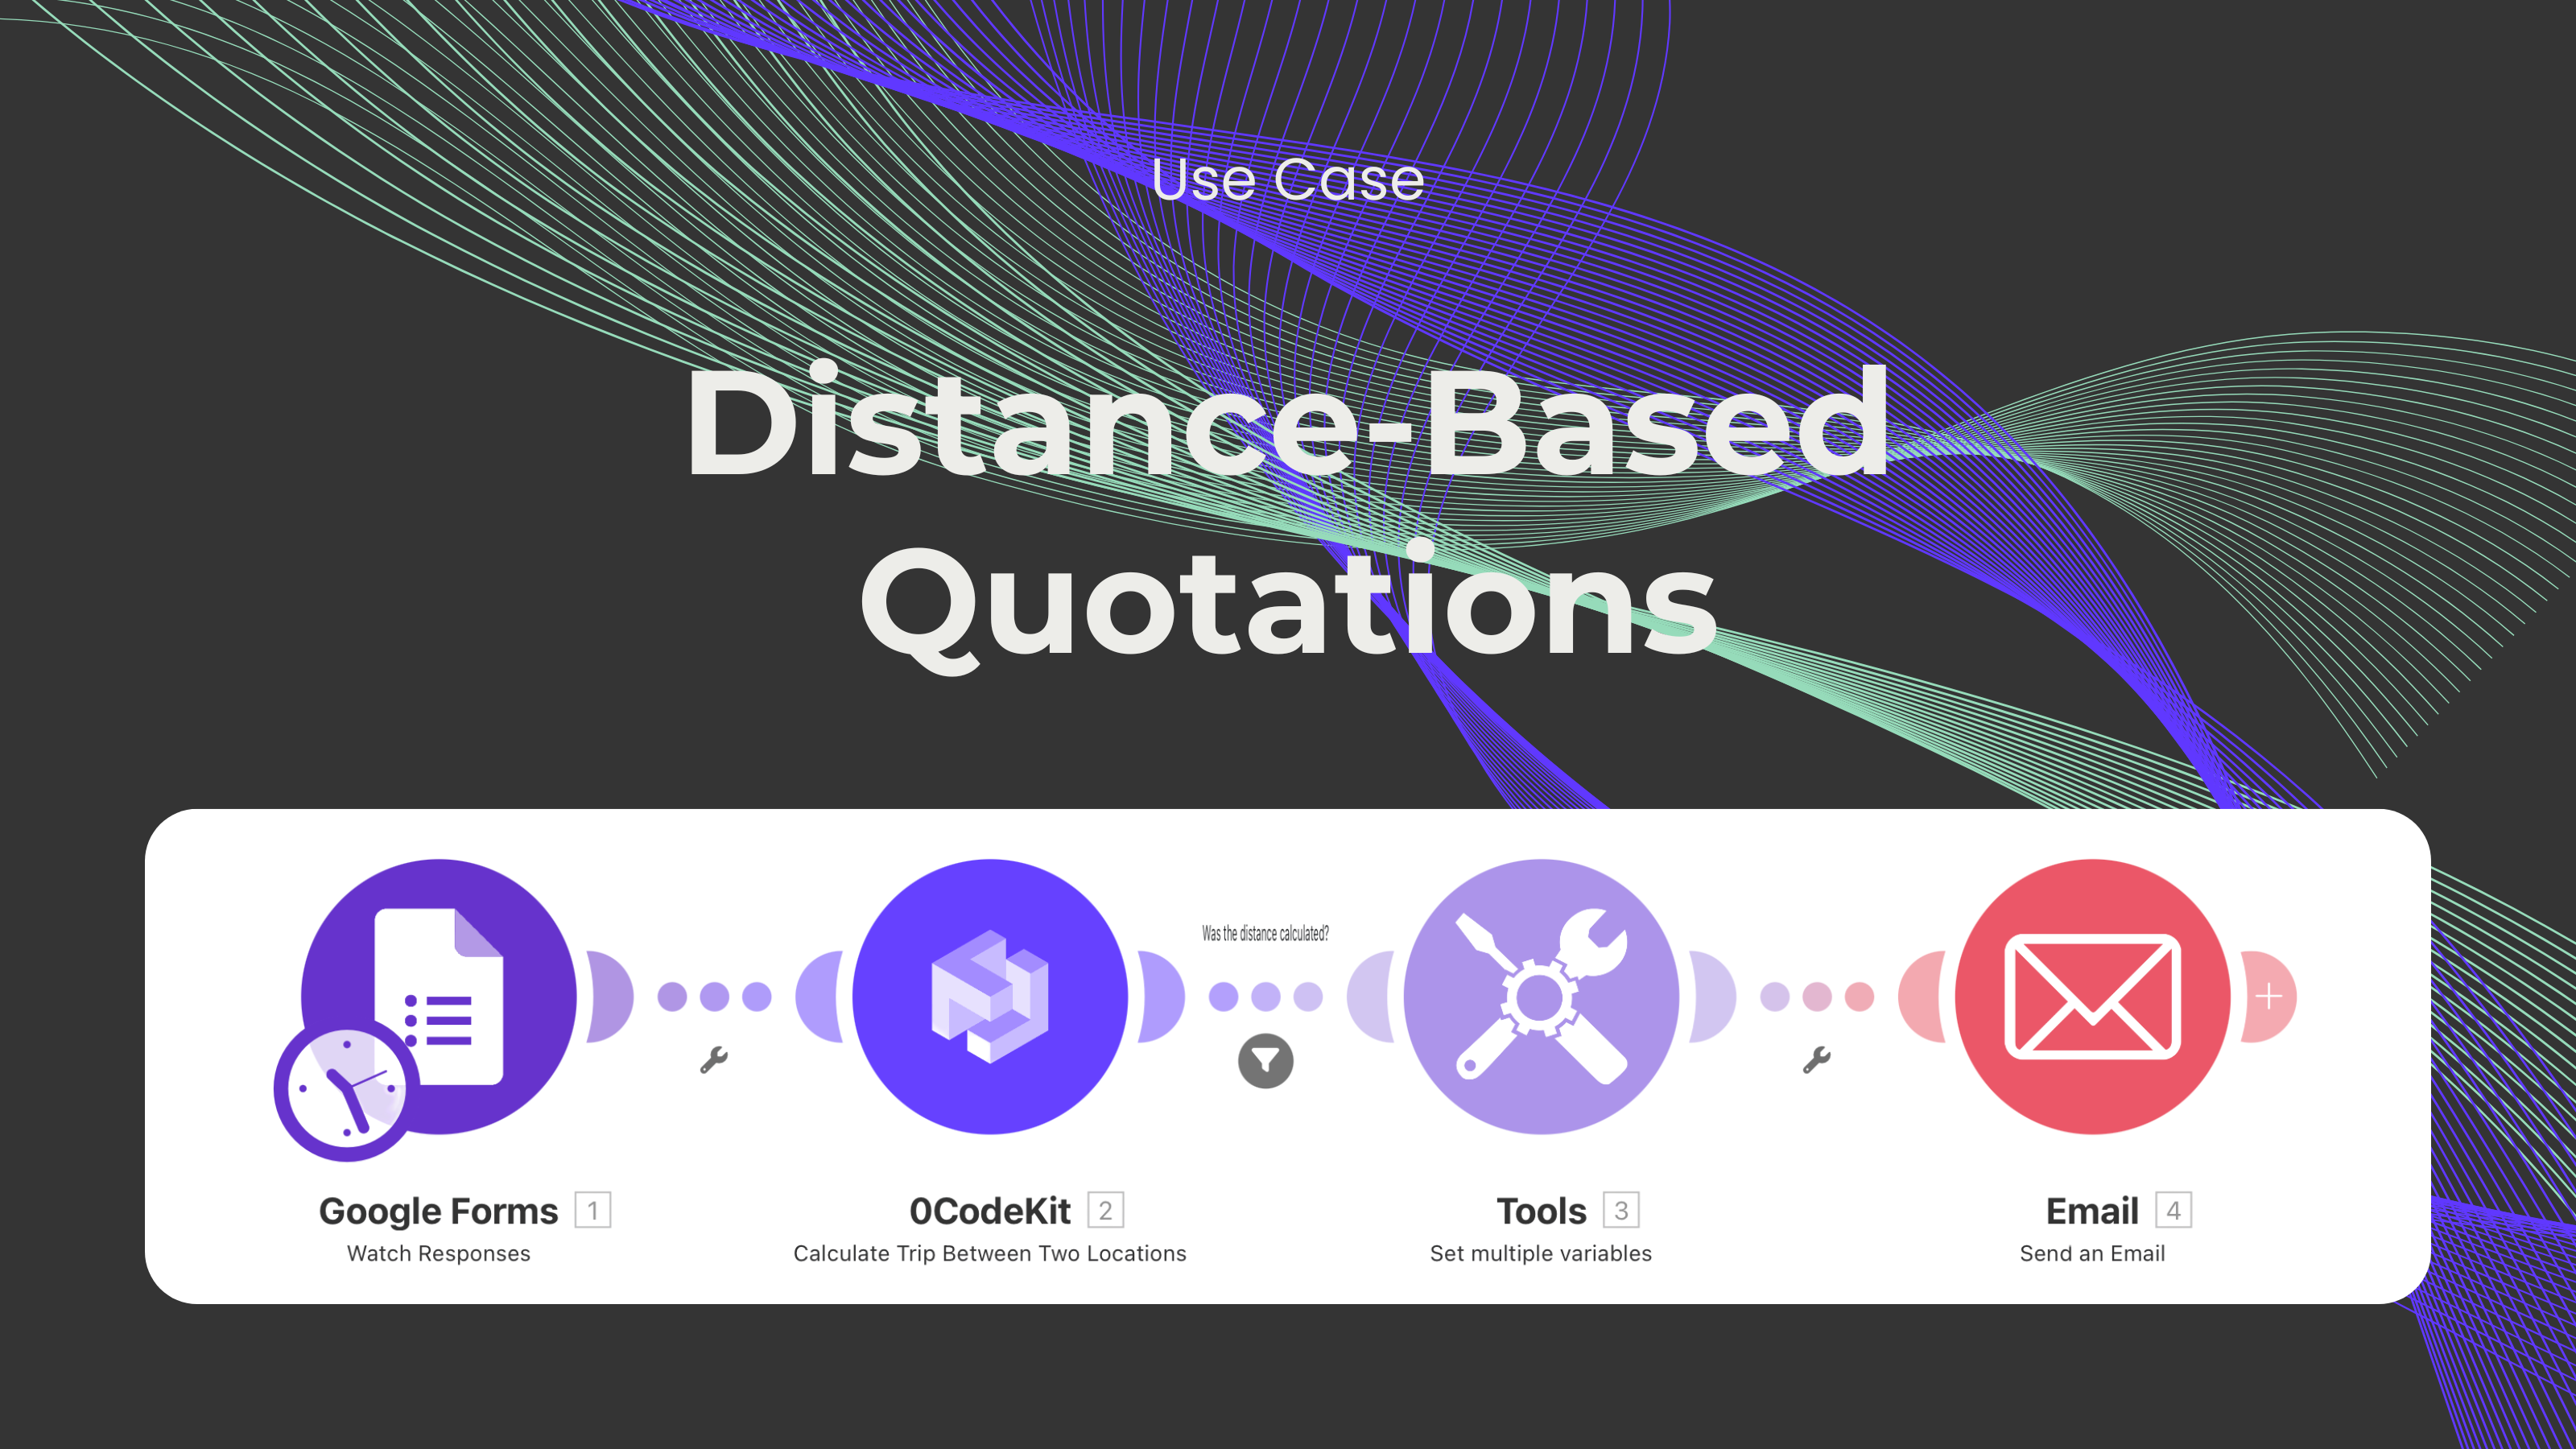
Distance-Based Quotations Automation
.png)
As the world grows to be more and more international and interconnected, many logistics companies struggle to keep up. They not only have to worry about keeping a good relationship with their customers and suppliers, but they also have to constantly look for new ways to be efficient and optimize their processes. They have to handle so much information, like what kind of terms agreement they have with suppliers and customers (Incoterms), what kind of transportation mode is needed (air, land, ocean, or mixed), customs, special permits, if the cargo has other specifications (for example, fragile), quotations, etc. It's too much information to handle!
With this in mind, we've come up with an automation that could help ease the burden of one of the things mentioned above: quotations. This automation calculates the distance between two locations, calculates the price for the shipment based on a price list provided, and provides this information to the customer. Without further ado, in this blog, we would like to show you how to set up this automation step by step.
First, we need to sign up or log in to one automation platform (Make, Zapier, and n8n) and create a scenario.
Then, we need to create a form where people can submit their shipping details and contact information. Depending on the type of shipping company one has, we can add an origin address as well to calculate the distance between the other company's warehouse and the destination address.

Later, once a form has been filled out, we can integrate a Google Forms module (it can also be Tally or another form builder) with the event "Watch Responses" to be able to access the information contained in the submitted forms. The module will ask us to provide the form ID and the limit of forms that should be processed at once.

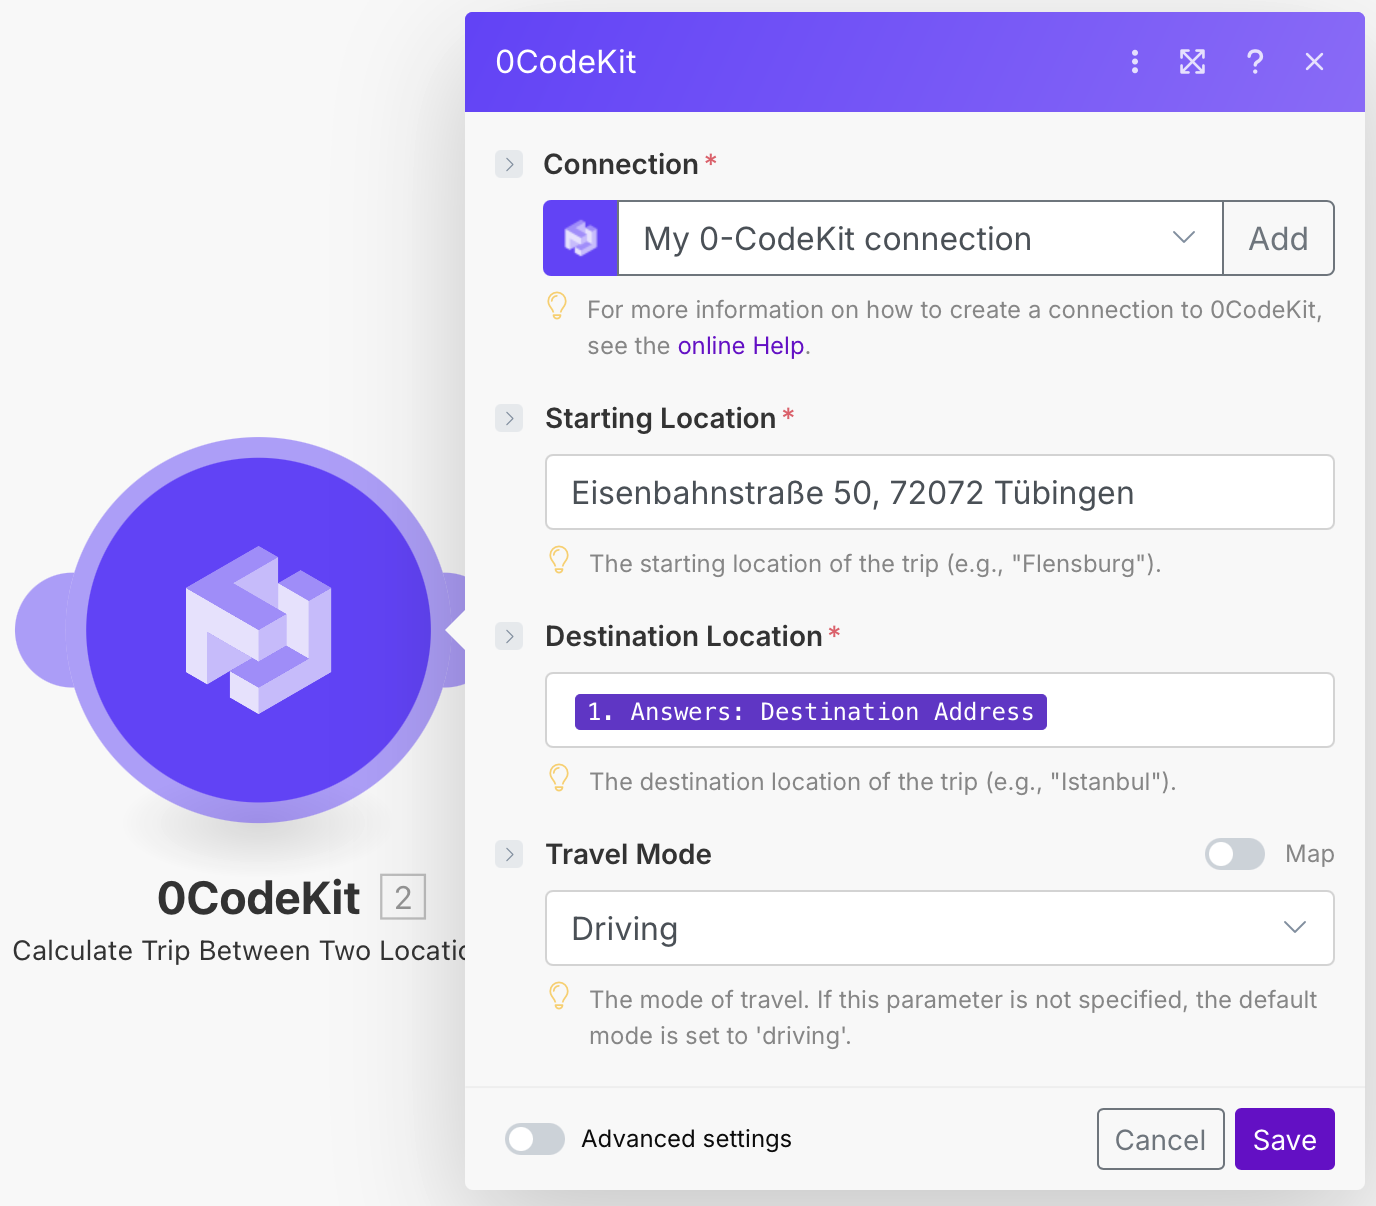
Afterwards, we need to integrate a 0CodeKit module with the event "Calculate Trip Between Two Locations", which will take the information from the form and calculate the distance between the two locations. In this case, we've set our offices as the starting location, but it could also be the warehouse/office address of the customer. For the destination location, we have to enter the item from the Google Forms module called "Destination Address" and specify what kind of transportation mode the delivery will be made (driving, walking, bicycling, or transit).
Subsequently, we need to integrate a Tools module with the event "Set Multiple Variables", where we will enter all the prices depending on the distance. For example, the first variable is called "0km" and the price for such a travelled distance will be 0 euros.

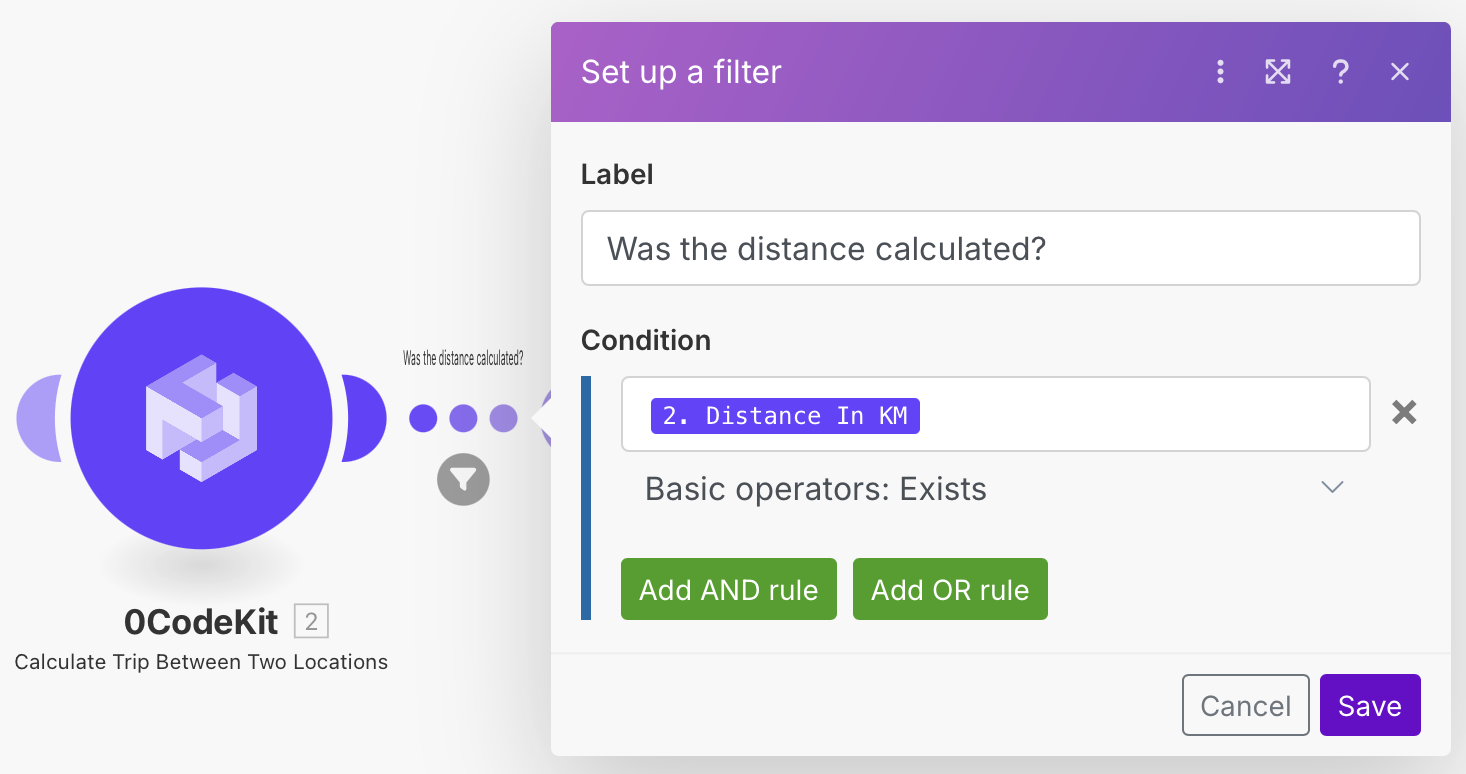
After that, a filter between the 0CodeKit module and the Tools module has to be set up. This filter will make sure that no other information than the distance in kilometers calculated by 0CodeKit will be sent to the Tools module. To set it up, we need to set the basic operator as "Exists" and add the 0CodeKit item called "Distance in KM".
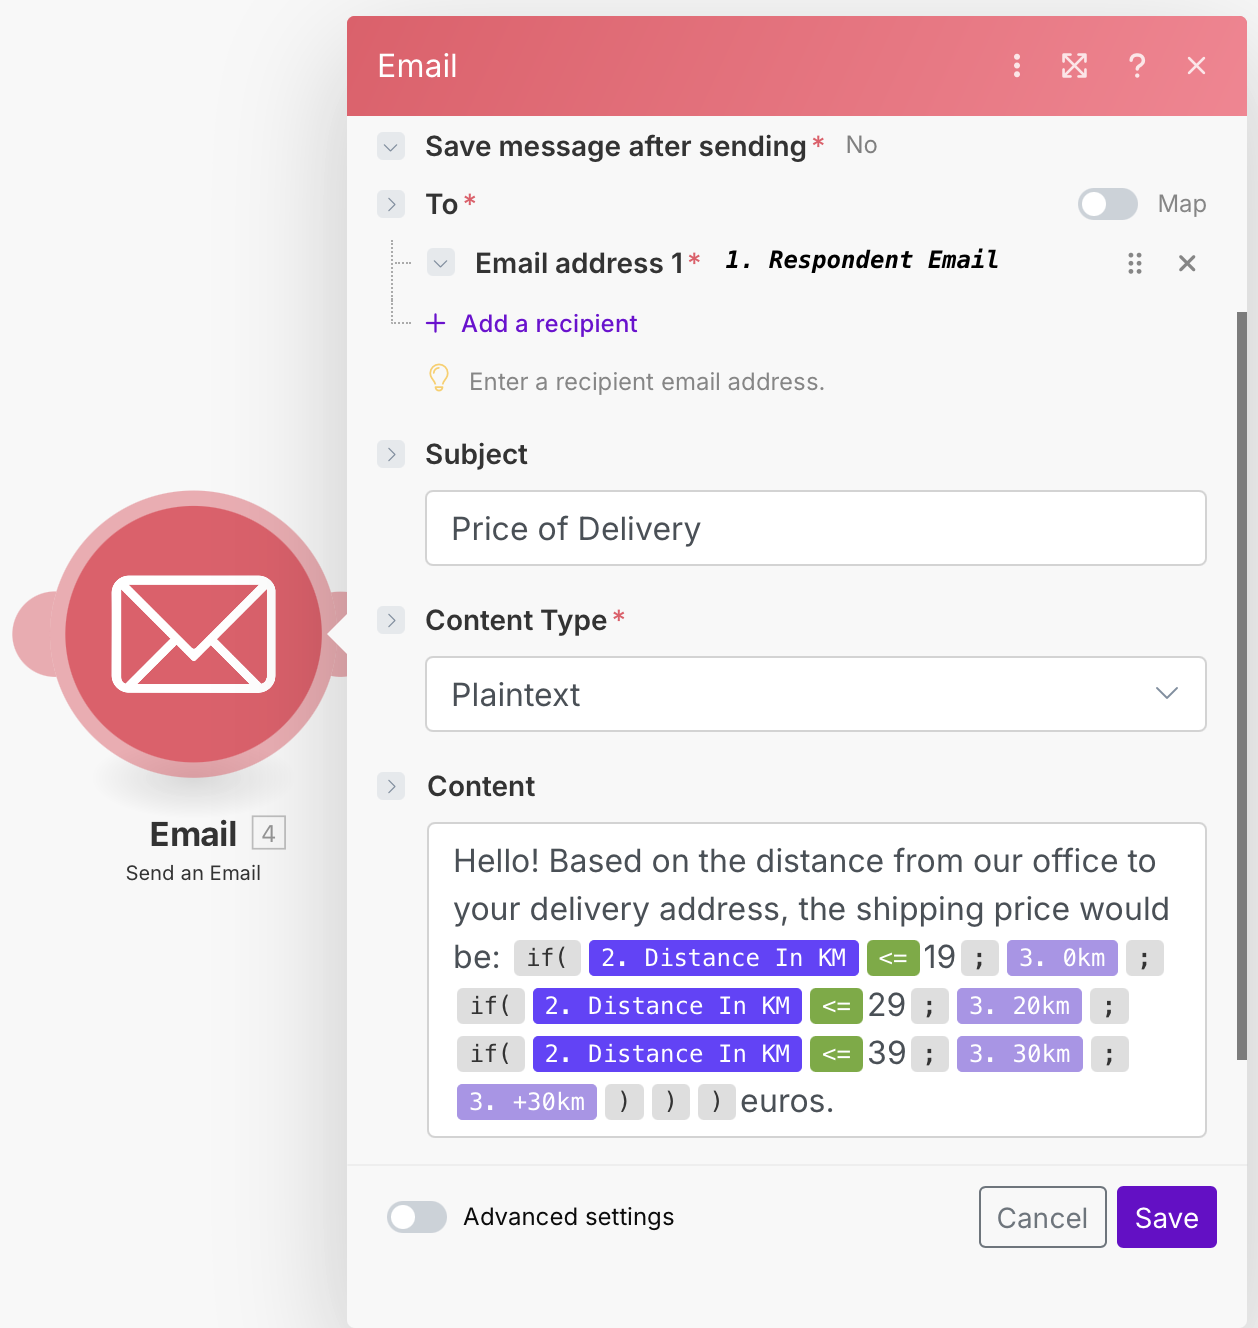
Finally, we need to integrate an Email module with the event "Send an Email", which will inform the customer about the prices depending on the distance. Here, we need to enter the Google Forms item called "Respondent Email", add a subject line for the email, specify that the content type will be plaintext, and write a function that will calculate the price just before the email is sent.