May 2025 Endpoint of the Month
.png)
Tools like Canva are making visual content creation accessible to anyone. For anyone with a business, a marketing department, someone working on a project, or a creative individual, these tools are helping them to achieve their goals. Years ago, overlaying images and removing backgrounds seemed to be something so complex that only professional designers would do. But now, with a content creator/editor and AI, anyone can do it.
For this same reason, we would like to be part of these achievements. This month, we would like to present our 'Overlay Two Images' endpoint, which can be used by anyone, even with our free plan.
First, we need to sign up or log into one automation platform where the Overlay Images endpoint is available (Make, Zapier, and n8n) and create a scenario.

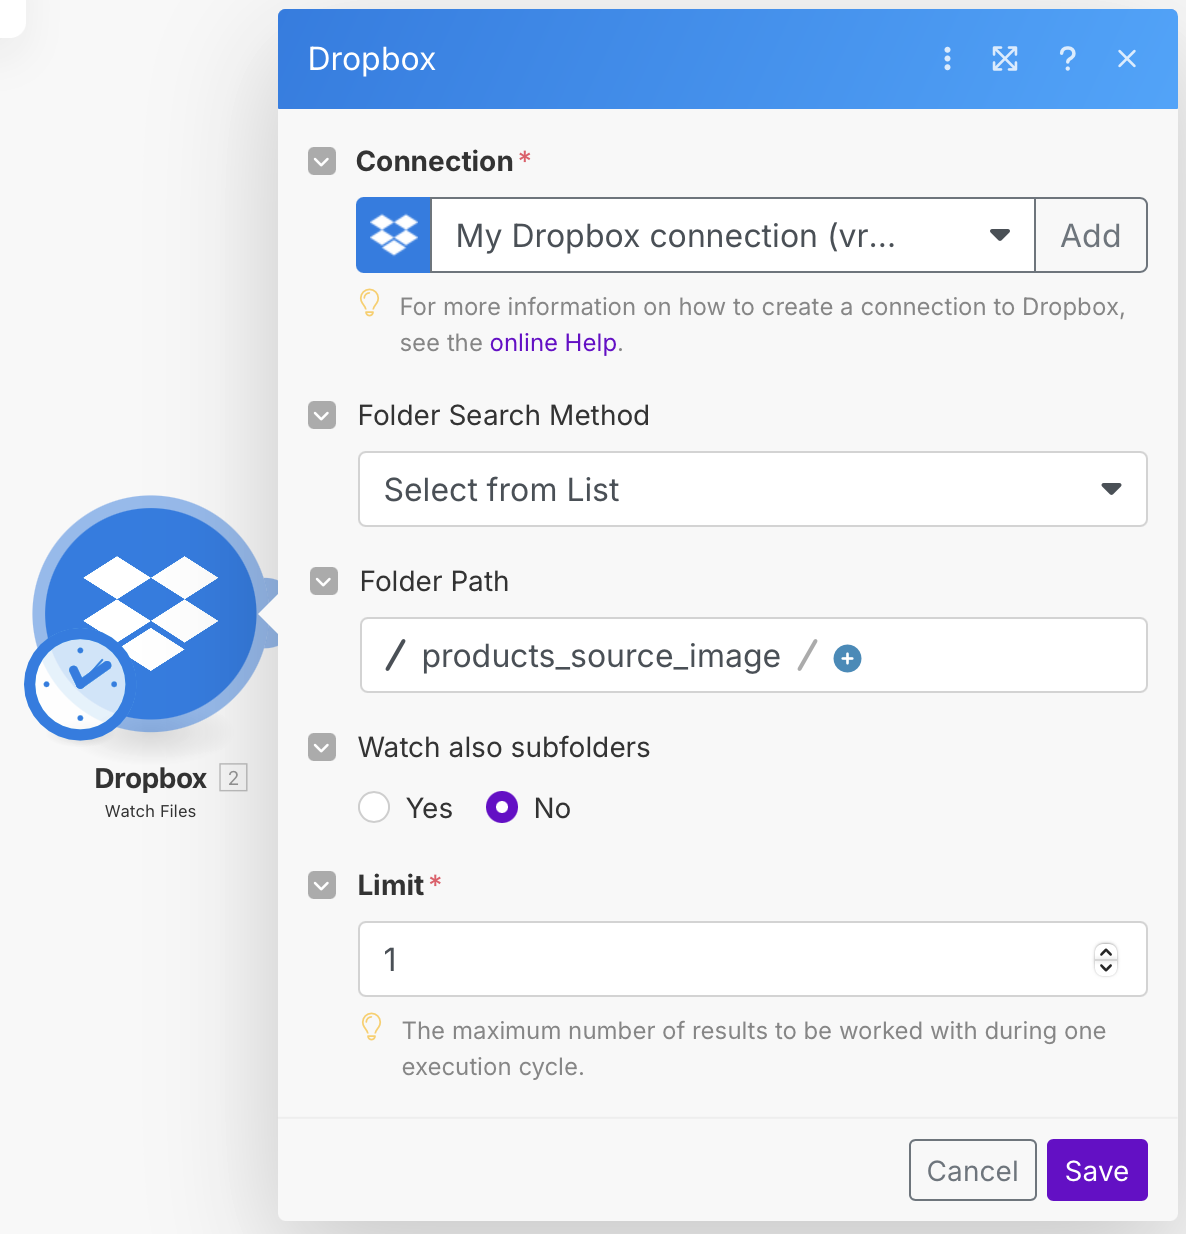
Then, we need to upload the images that we would like to overlay to some sort of storage tool, like Dropbox. Once done, we can integrate a Dropbox module with the event 'Watch Files', which will analyse which documents or images are being uploaded to a specific folder. To configure it, we need to specify the folder that we would like to analyse and limit the results to be worked with during an execution cycle to 1.
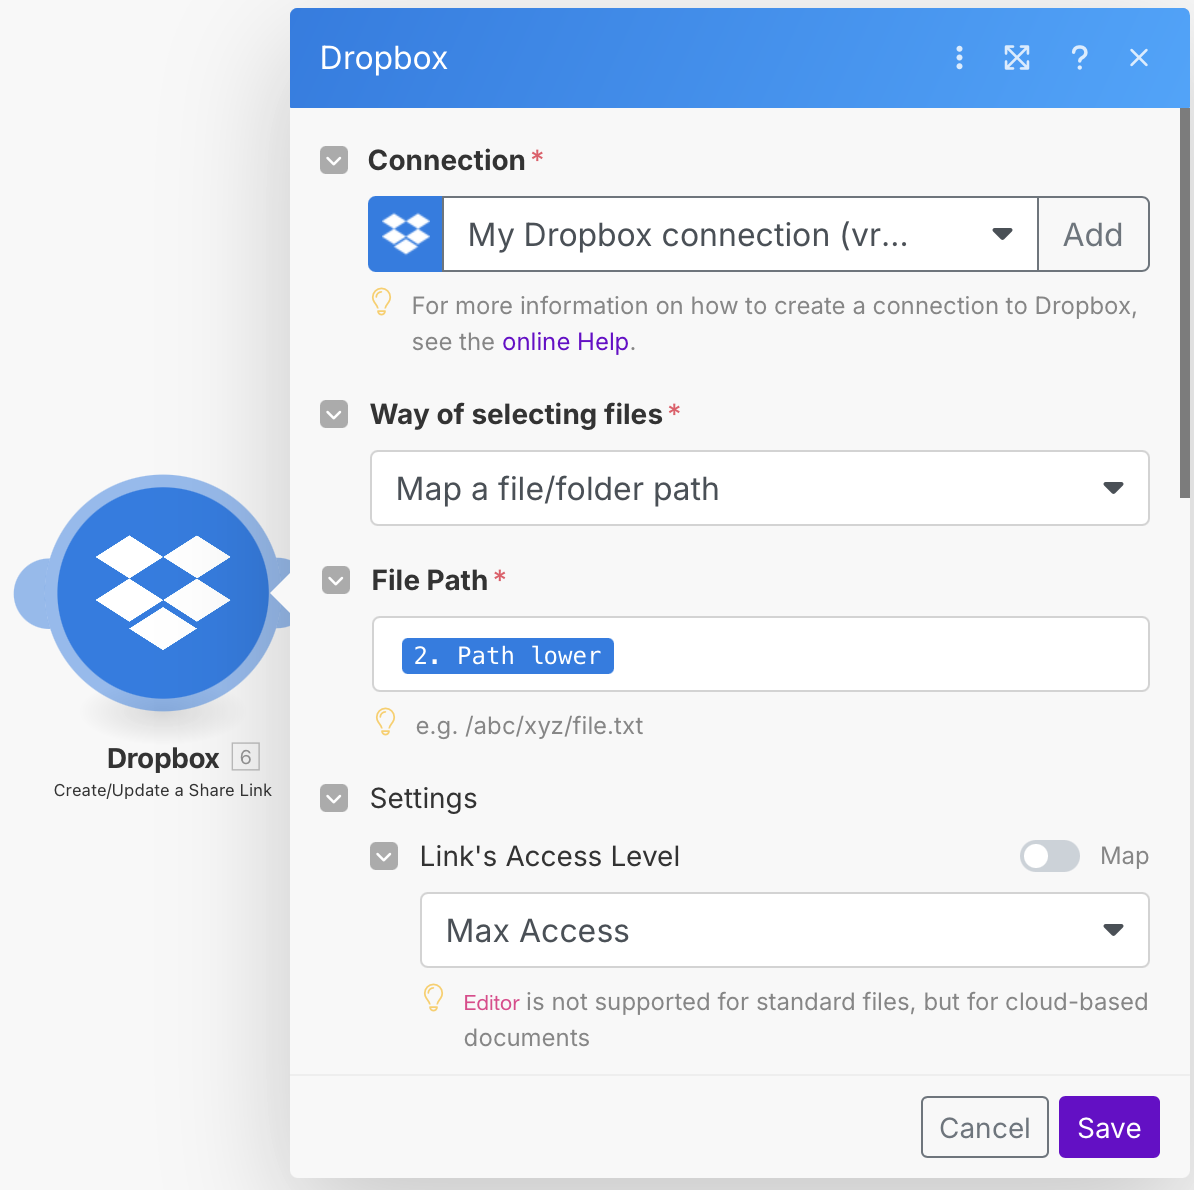
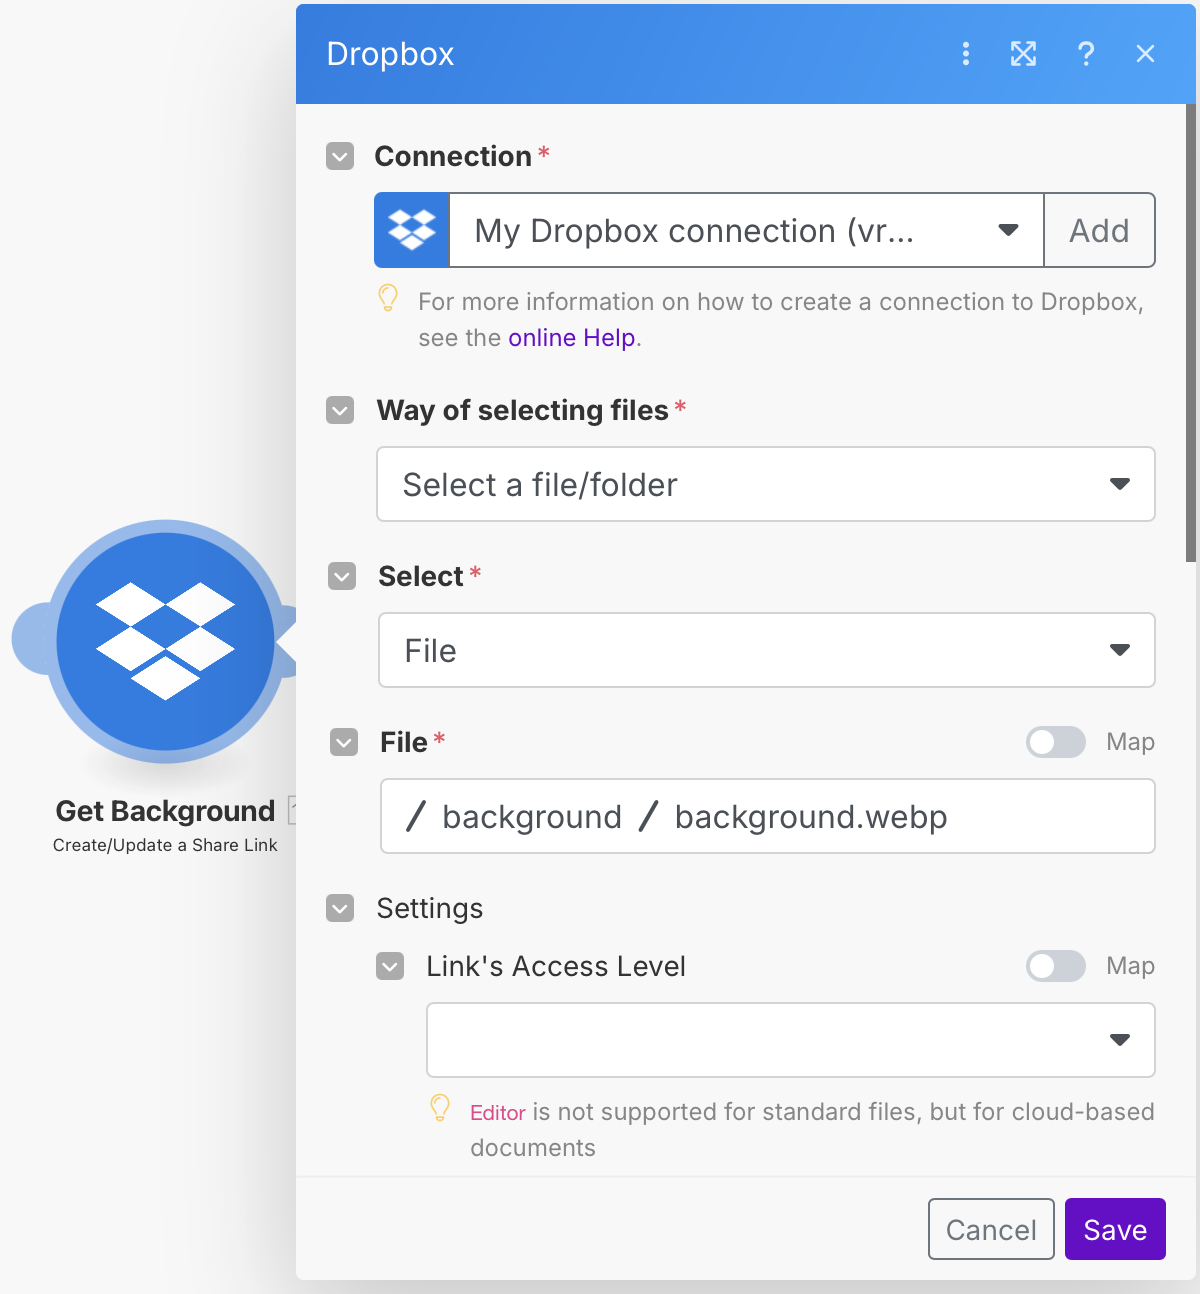
Later, we need to add another Dropbox module with the event 'Create/Update a Share Link', which will create a link that will facilitate access to the front images. To configure it, we need to enter the icon 'Path lower' from the first Dropbox module into the 'File Path' field to tell the module which images this applies to, and give the module full access to this location and images.
Afterwards, we need to integrate a 0CodeKit module with the event 'Remove Background from Image', which will remove the background of the front image for better results. To configure it, we need to enter the icon 'Download Url' of the image that is intended to go in the front into the 'Image Url' field, and specify if we want the output as a URL.

Subsequently, we need another Dropbox module with the event 'Create/Update a Share Link', which will create an access link for the intended background image. To configure it, we need to specify where this image is.
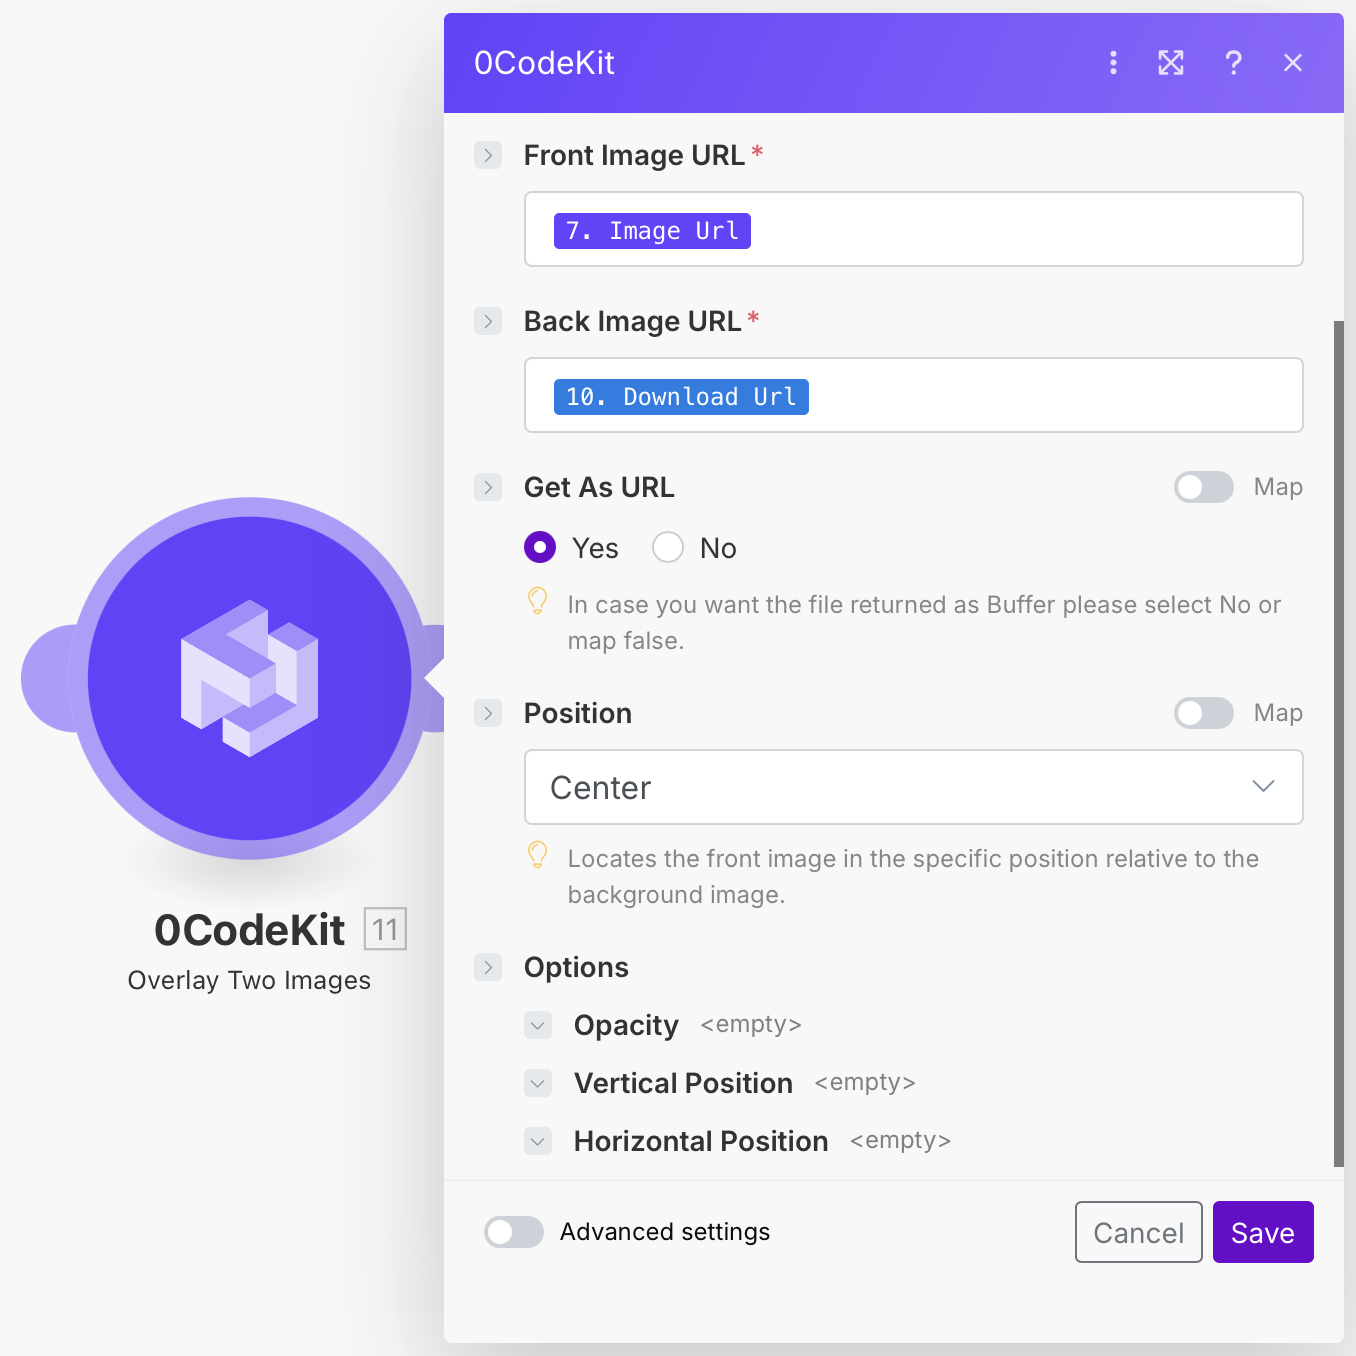
Finally, we need to integrate another 0CodeKit module with the event 'Overlay Two Images', which will put together the URL's front image (without background) and background image. To configure it, we need to enter the icon 'Image Url' from the 0CodeKit module 'Remove Background from Image' into the 'Front Image URL' field. Moreover, we need to enter the icon 'Download Url' for the background image that we created with the Dropbox module into the 'Back Image URL' field. In addition, we need to specify if we want the output as a URL, and the location where the front image should be on the background image.
Note: For this part, all the previous modules must already be configured. This is just an addition to the previous scenario.

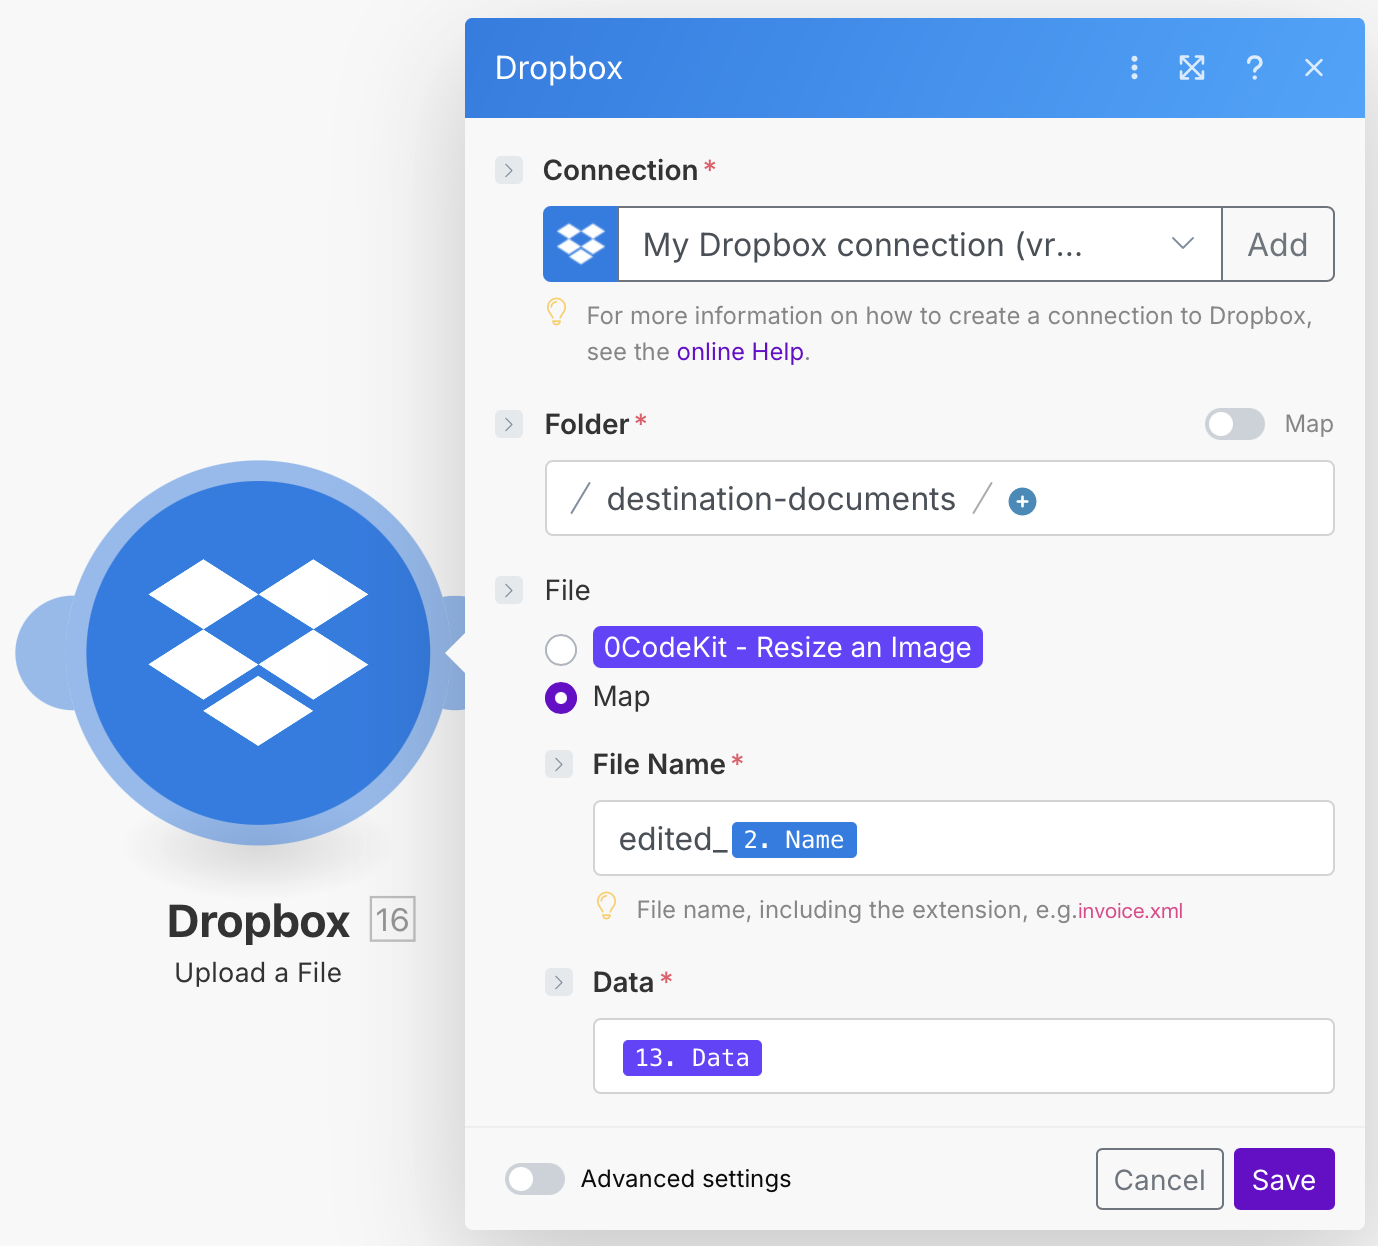
Now, if we would like, for example, to put the company's logo on the overlayed image, this can also be done with the help of 0CodeKit. For that, we need to integrate a 0CodeKit module with the event 'Resize an Image', which will make sure that the logo has the required measurements. To configure it, we need to enter the URL of the logo into the 'Image File URL' field, specify the width and height we would like it to have, and make sure that we get the output as a URL.

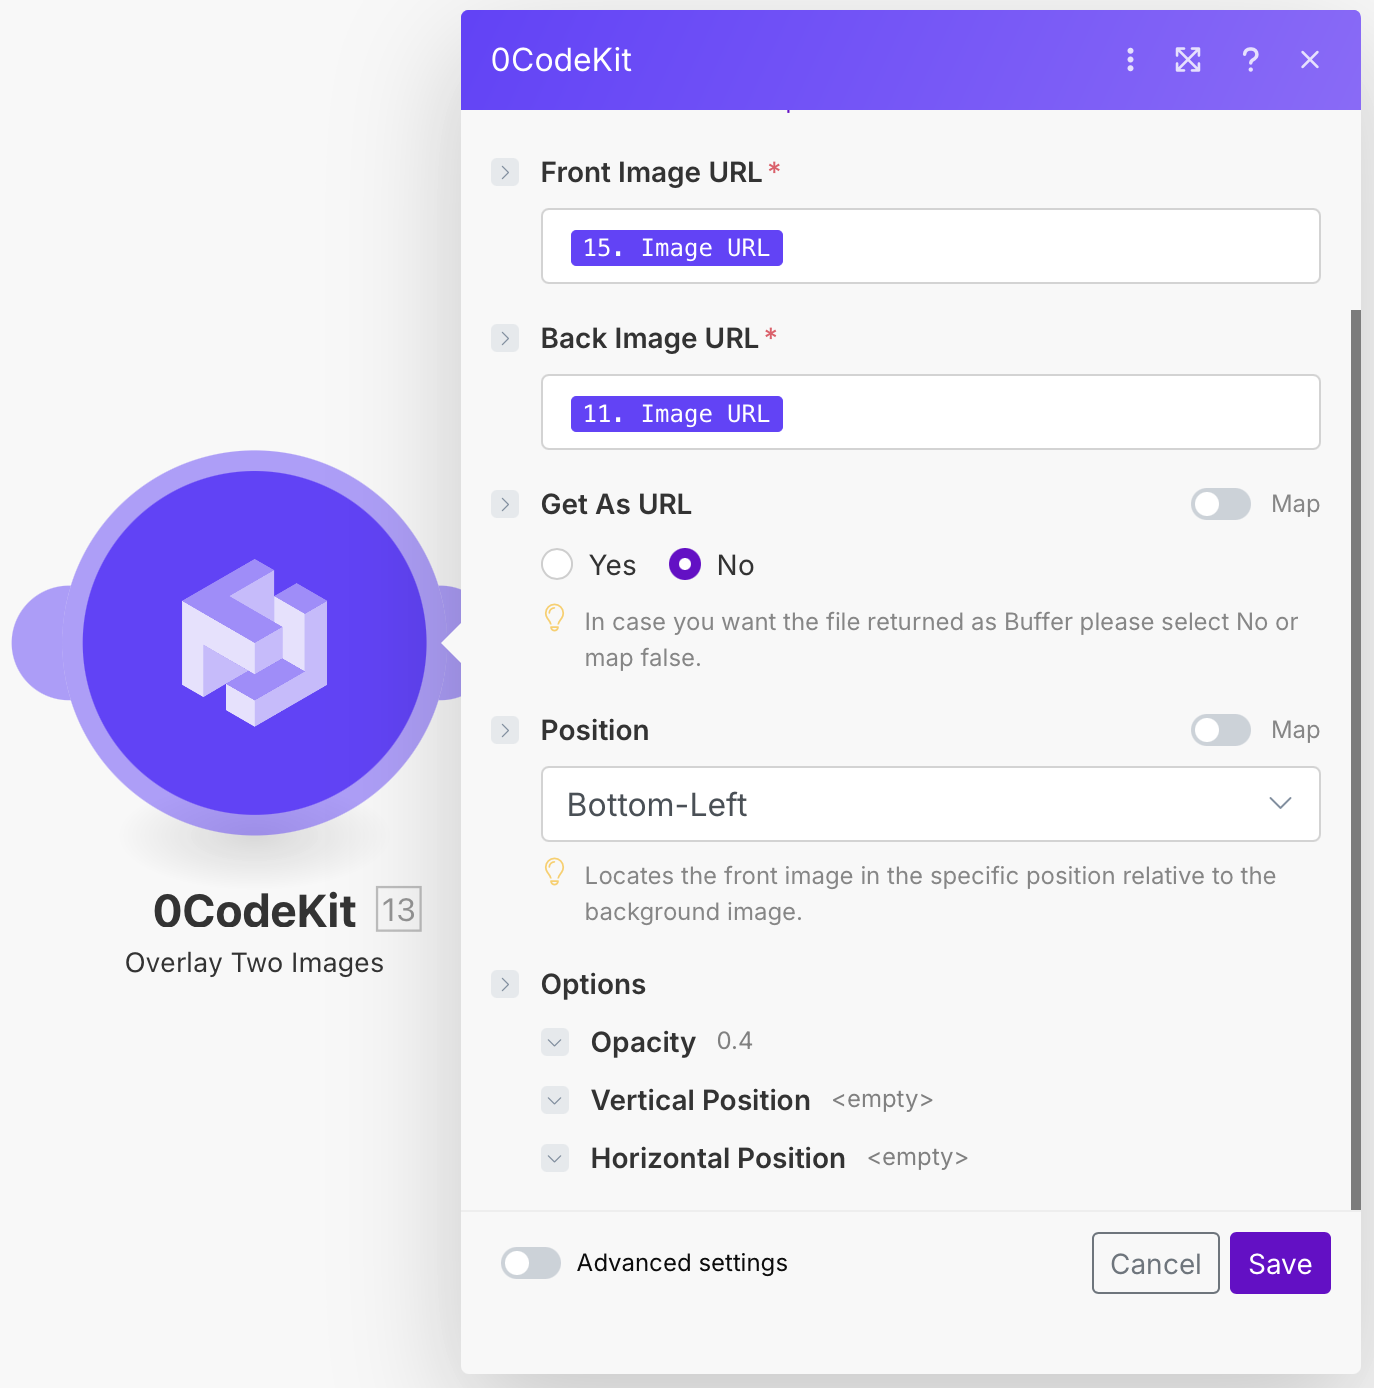
After that, we need another 0CodeKit module with the event 'Overlay Two Images', which will take the previously overlayed image and add a watermark logo on it. To configure it, we need to enter the icon 'Image URL' from the previous 'Overlay Two Images' module into the 'Front Image URL' field. Then, we need to enter another icon 'Image URL' from the 'Resize an Image' module into the 'Back Image URL' field. We also must make sure that we get the output as a URL and determine where we would like the logo to be inserted. Important: the opacity of the front image can be arranged to become more transparent.
Finally, we can add a Dropbox module with the event 'Upload a File', which will store that final overlayed image in a specific folder. To configure it, we need to specify the folder where we would like to store the image, give the file a name, and enter the icon 'Data' from the second 'Overlay Two Images' module into the 'Data' field.